Connect your coding agent to CRUX: Claude Code, Codex, Cursor and other MCP clients
CRUX team · · Updated · 6 min read
MCP in one paragraph
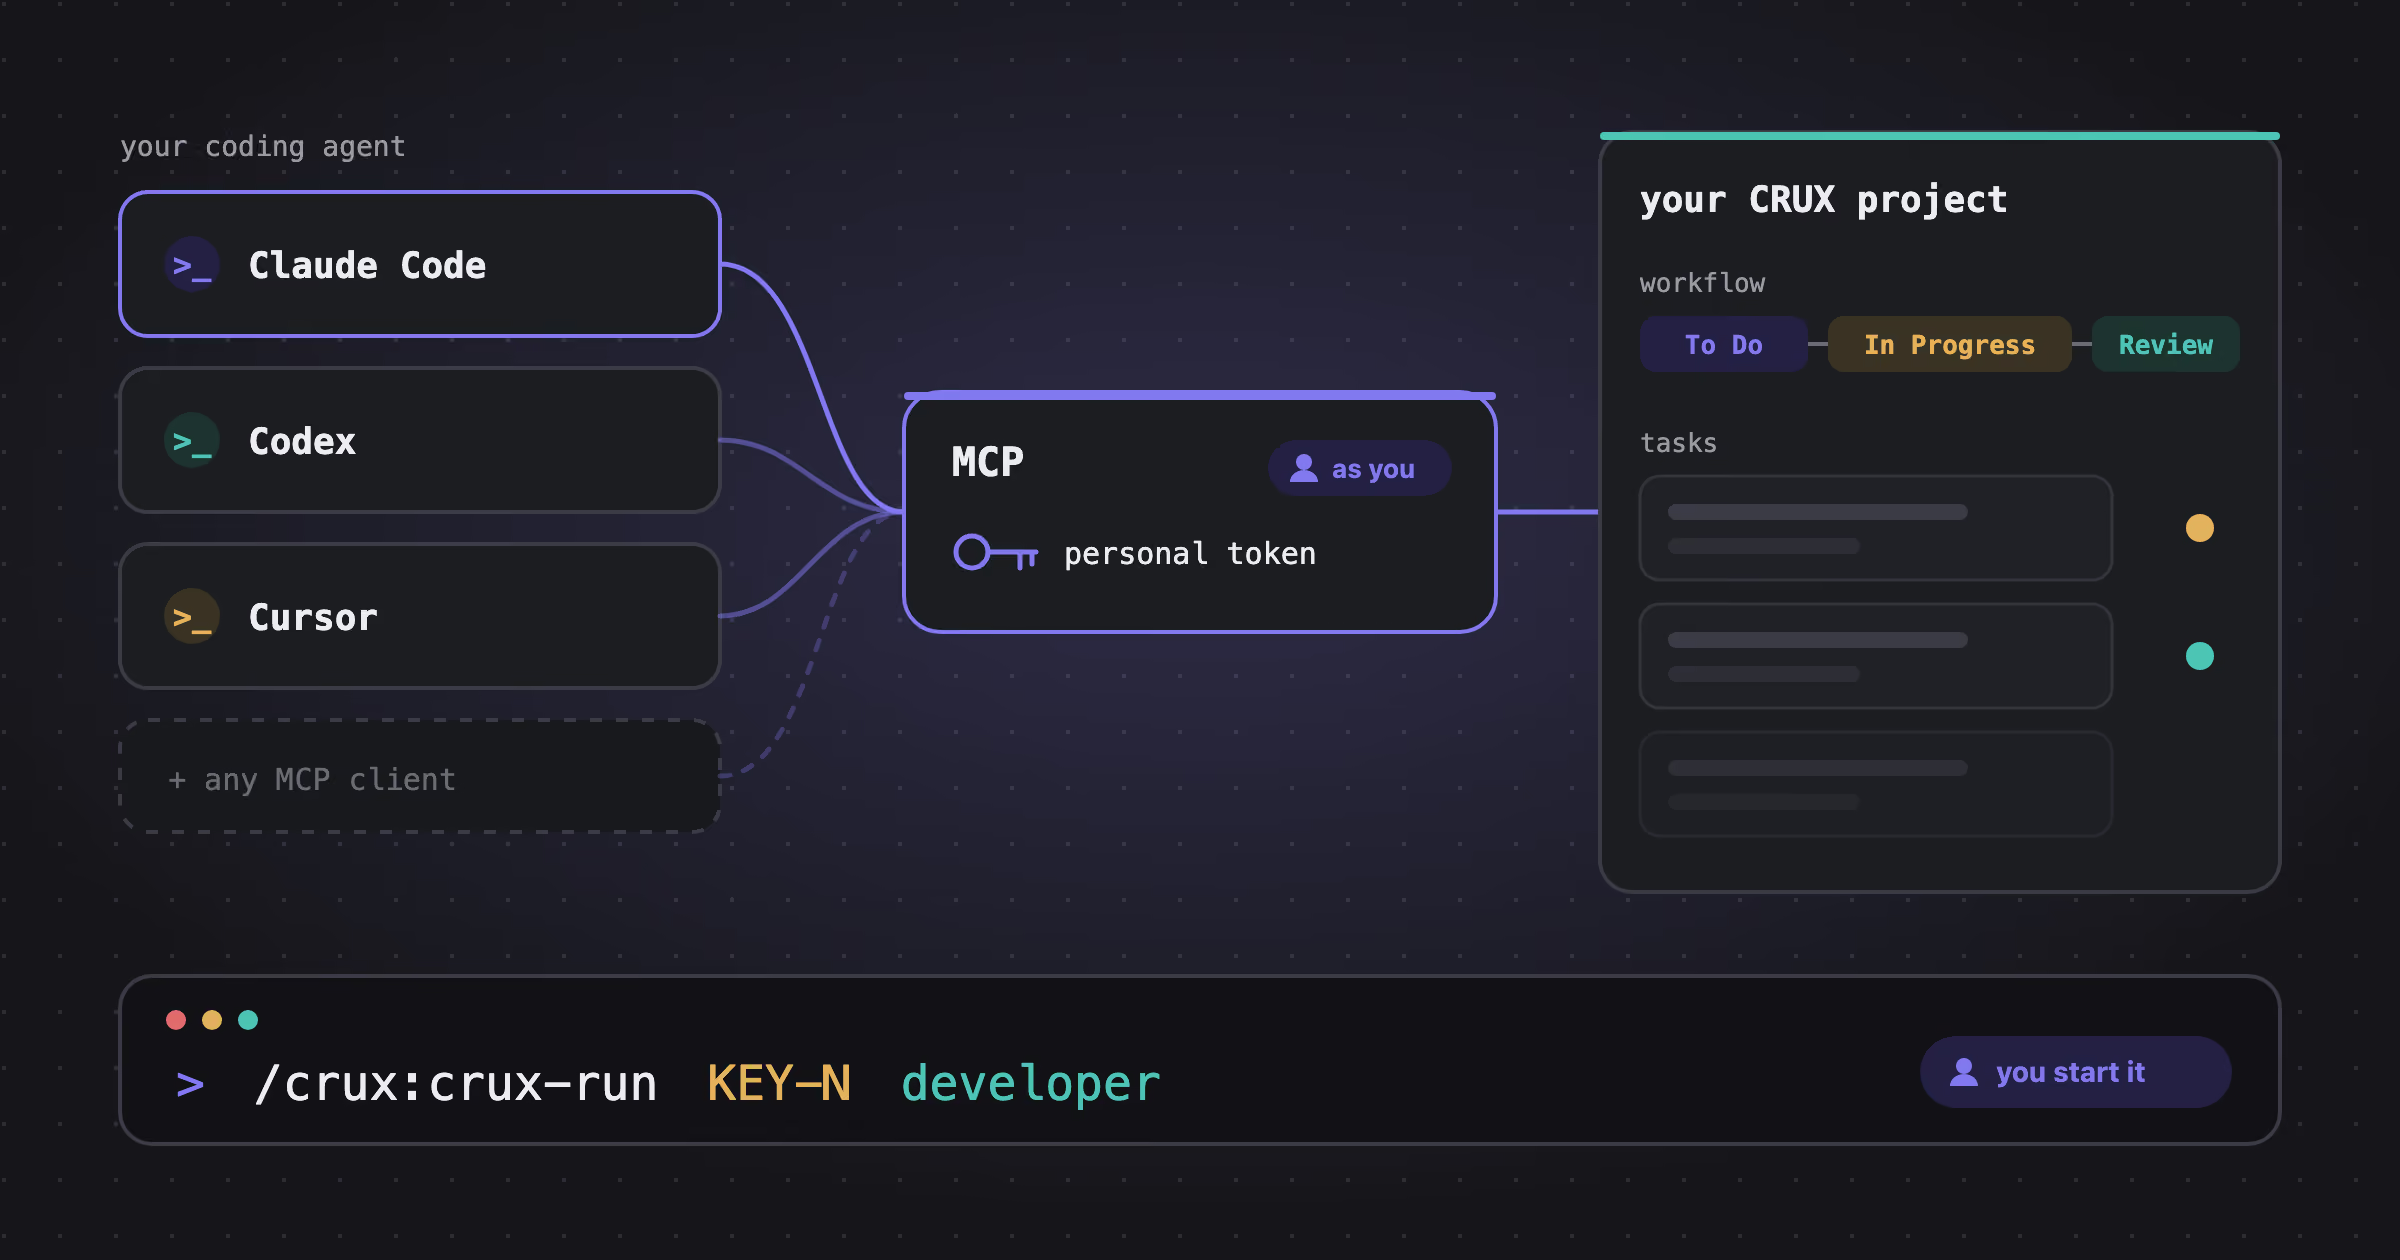
MCP (the Model Context Protocol) is the standard plug that lets a coding agent use outside tools. CRUX speaks it, so the agent you already use (Claude Code, Codex, Cursor or another MCP client) can work with your CRUX project: it reads the project's tasks and workflow, and acts in it as you. Nothing to install on the CRUX side; you add one server entry to your agent. It takes about a minute, once per project. (New to CRUX? Start with How CRUX works.)
The Connect your coding agent dialog, step by step
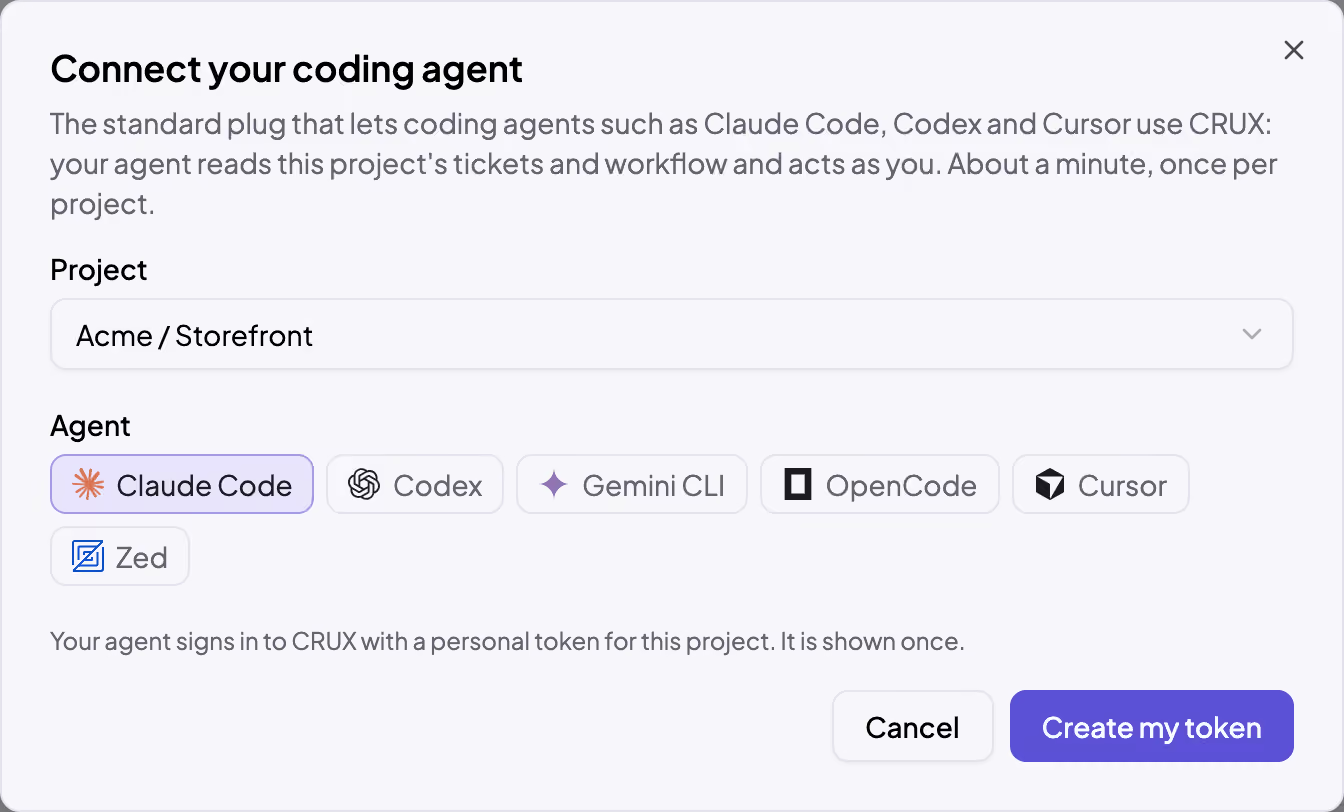
You open the dialog from the Connect your coding agent button: on your home page, on a project's Workspace and in its Workflow area and Settings. It has three steps.
- Project. Pick the project your agent should work on. A token works on one project only, so you connect each project you work on once. A project that is still being set up, or is archived, can't take agents; the dialog says why, and a project still being set up is finished by a project admin with Create project in its Settings.
- Agent. Pick your coding agent: Claude Code, Codex, Gemini CLI, OpenCode, Cursor or Zed.
- Create my token. CRUX creates your personal token and fills in your agent's setup with it and with the project's address. Each snippet has its own copy button.
The setup depends on the agent. Below is each one, exactly as the dialog writes it; PROJECT_ID and YOUR_TOKEN stand for the project's address and the token the dialog fills in.
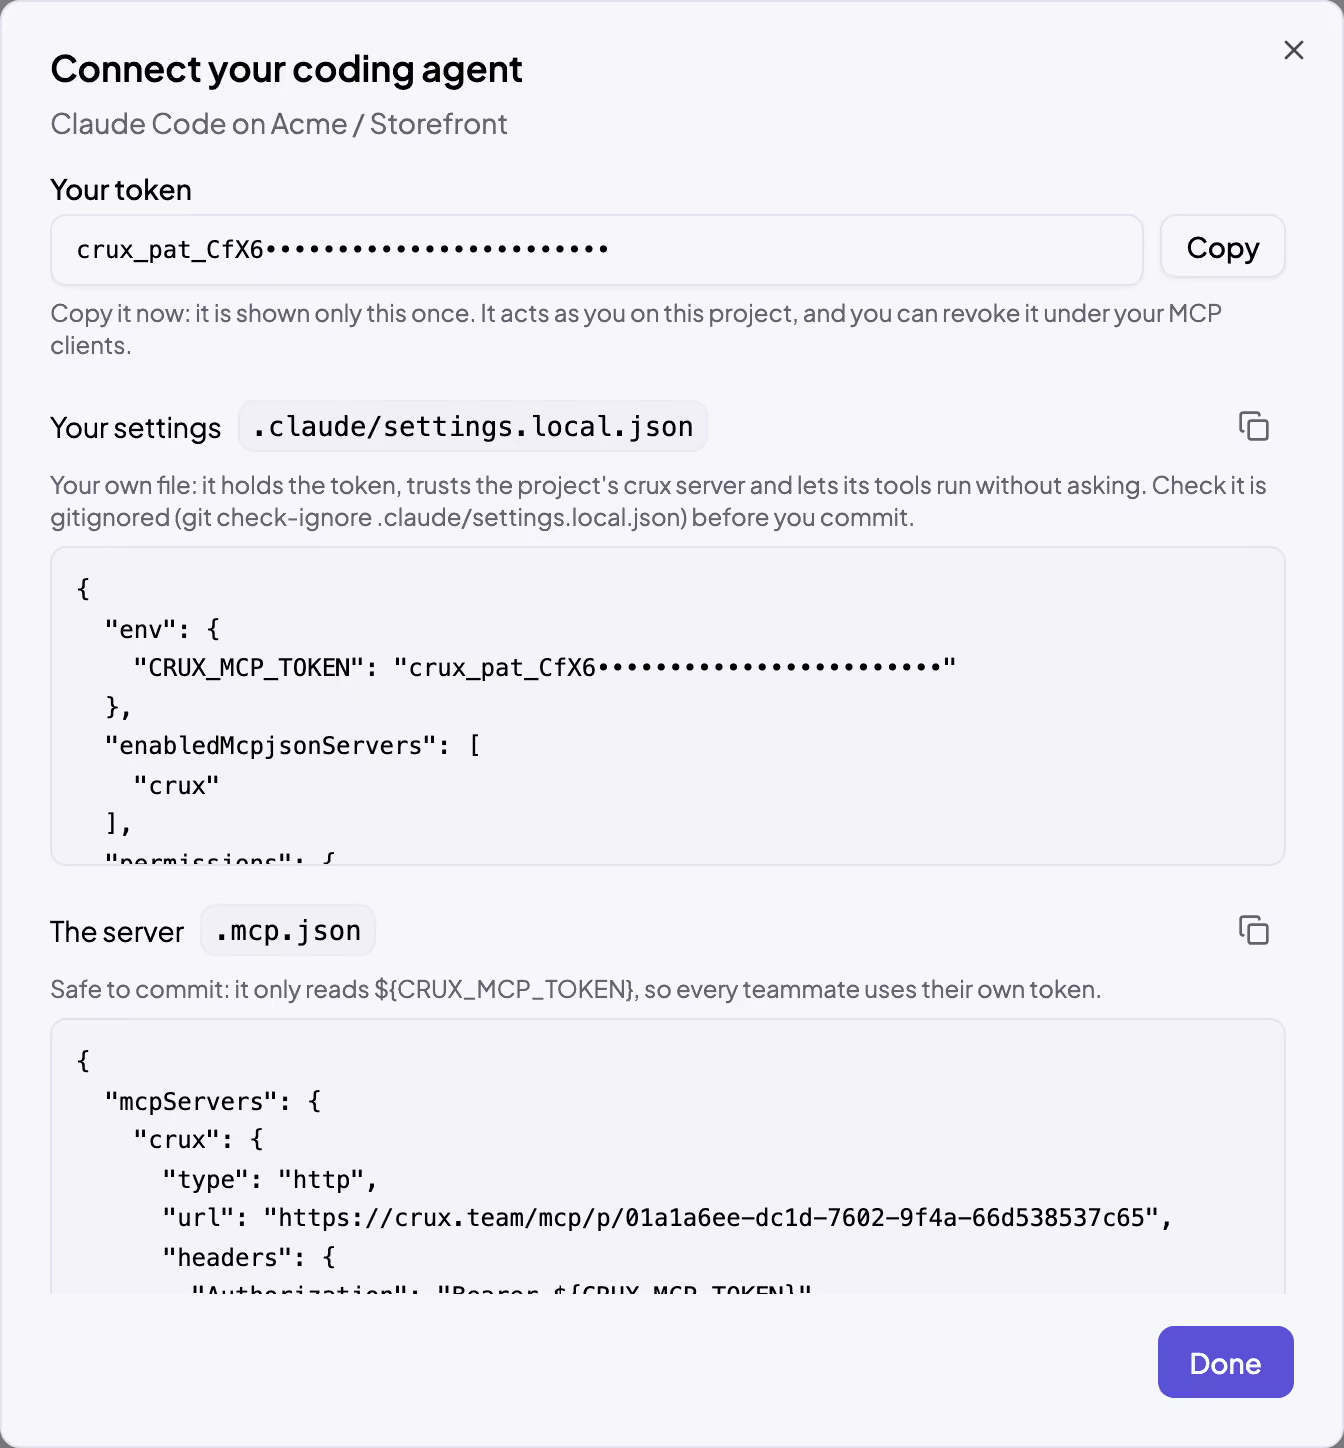
Claude Code
Two files in your repository. .claude/settings.local.json is your own: it holds the token, trusts the project's crux server and lets its tools run without asking. Check it is gitignored (git check-ignore .claude/settings.local.json) before you commit.
{
  "env": {
    "CRUX_MCP_TOKEN": "YOUR_TOKEN"
  },
  "enabledMcpjsonServers": [
    "crux"
  ],
  "permissions": {
    "allow": [
      "mcp__crux__*"
    ]
  }
}
.mcp.json names the server and reads the token from ${CRUX_MCP_TOKEN}, so it is safe to commit, and every teammate uses their own token.
{
  "mcpServers": {
    "crux": {
      "type": "http",
      "url": "https://crux.team/mcp/p/PROJECT_ID",
      "headers": {
        "Authorization": "Bearer ${CRUX_MCP_TOKEN}"
      }
    }
  }
}
Restart Claude Code in the repository, then check it:
claude mcp listCodex
Export the token in your shell. Put it in your shell profile or a secrets manager rather than typing it, and never in a committed file:
export CRUX_MCP_TOKEN=YOUR_TOKENThen add the server with one command:
codex mcp add crux --url https://crux.team/mcp/p/PROJECT_ID --bearer-token-env-var CRUX_MCP_TOKENOr put the same lines in ~/.codex/config.toml. Codex reads a project's .codex/config.toml only in a trusted project, so the user file is the safer place.
[mcp_servers.crux]
url = "https://crux.team/mcp/p/PROJECT_ID"
bearer_token_env_var = "CRUX_MCP_TOKEN"
Gemini CLI
The same exported token:
export CRUX_MCP_TOKEN=YOUR_TOKENThen add the server:
gemini mcp add -t http -s project -H 'Authorization: Bearer $CRUX_MCP_TOKEN' crux https://crux.team/mcp/p/PROJECT_IDOr edit .gemini/settings.json. The key is httpUrl, not url: url means the old SSE transport.
{
  "mcpServers": {
    "crux": {
      "httpUrl": "https://crux.team/mcp/p/PROJECT_ID",
      "headers": {
        "Authorization": "Bearer $CRUX_MCP_TOKEN"
      }
    }
  }
}
OpenCode
The same exported token:
export CRUX_MCP_TOKEN=YOUR_TOKENThen add a crux entry to opencode.json. oauth: false makes OpenCode send the token instead of trying to sign in.
{
  "$schema": "https://opencode.ai/config.json",
  "mcp": {
    "crux": {
      "type": "remote",
      "url": "https://crux.team/mcp/p/PROJECT_ID",
      "oauth": false,
      "headers": {
        "Authorization": "Bearer {env:CRUX_MCP_TOKEN}"
      }
    }
  }
}
Check it:
opencode mcp listCursor
The same exported token:
export CRUX_MCP_TOKEN=YOUR_TOKENThen a crux entry in .cursor/mcp.json. The same file serves the Cursor CLI.
{
  "mcpServers": {
    "crux": {
      "url": "https://crux.team/mcp/p/PROJECT_ID",
      "headers": {
        "Authorization": "Bearer ${env:CRUX_MCP_TOKEN}"
      }
    }
  }
}
Check it:
agent mcp listZed
Zed does not expand environment variables here, so the token goes into your personal Zed settings.json (Zed → Settings → AI → MCP Servers). Keep that file out of every repository.
{
  "context_servers": {
    "crux": {
      "url": "https://crux.team/mcp/p/PROJECT_ID",
      "headers": {
        "Authorization": "Bearer YOUR_TOKEN"
      }
    }
  }
}
Any other MCP client
Any other MCP client connects to the same project address. If it can send a header, give it the token as Authorization: Bearer …. If it signs in through the browser instead, CRUX shows you which client asks for which project, and it connects only once you allow it.
Your personal token, and what your agent can do as you
The token is shown once, when it is created. Copy it then; if you lose it, create a new one. Keep it in your shell profile or a secrets manager, never in a committed file.
A token works on one project, as you, for as long as you can open that project. It gives your agent no more than you have yourself:
- Read the project's tasks, their comments, links and attachments, the sprints, and the workflow: which statuses CRUX acts on, which role owns each one, and which agents help there.
- Write to tasks: comments, artifacts (the structured comments each pipeline step leaves behind), links, new tasks and estimates. They appear in your tracker under your name, so teammates see who did what. If your tracker account isn't linked to CRUX yet, you link it once in the dashboard.
- Start pipeline steps on tasks, as described below.
It never reaches another project, another organization, or a project you have left.
Starting a step from your agent
A connected agent doesn't start work on its own; a person starts every step. There are two ways to start one on your machine.
With the crux plugin for Claude Code. The plugin is public (github.com/cruxteam/skills) and installs with:
claude plugin marketplace add cruxteam/skills
claude plugin install crux@cruxteam
Then, in your checkout, one command starts one step of one task:
/crux:crux-run KEY-N plannerKEY-N is the task's key and planner the pipeline agent of its status. The plugin claims the step for you and opens a new session, which fetches that agent's instructions from CRUX and starts on the task. The plugin's crux-dispatch does the same for several tasks of a role at once.
With Copy prompt & wait, in any agent. In the dashboard, open the pipeline step on the task and, on its Run on my machine card (Runs on your machine for an agent that needs your checkout), press Copy prompt & wait. The full prompt goes to your clipboard and the step waits for your agent; paste the prompt into Claude Code, Codex, Cursor or whichever agent you connected. The button's menu also copies the prompt without the Claude Code Desktop part, or just the /crux:crux-run command.
Either way, the agent checks in with you at the approval checkpoints and posts its artifact to the task only after your explicit ok. The next step waits for you again.
Taking access back
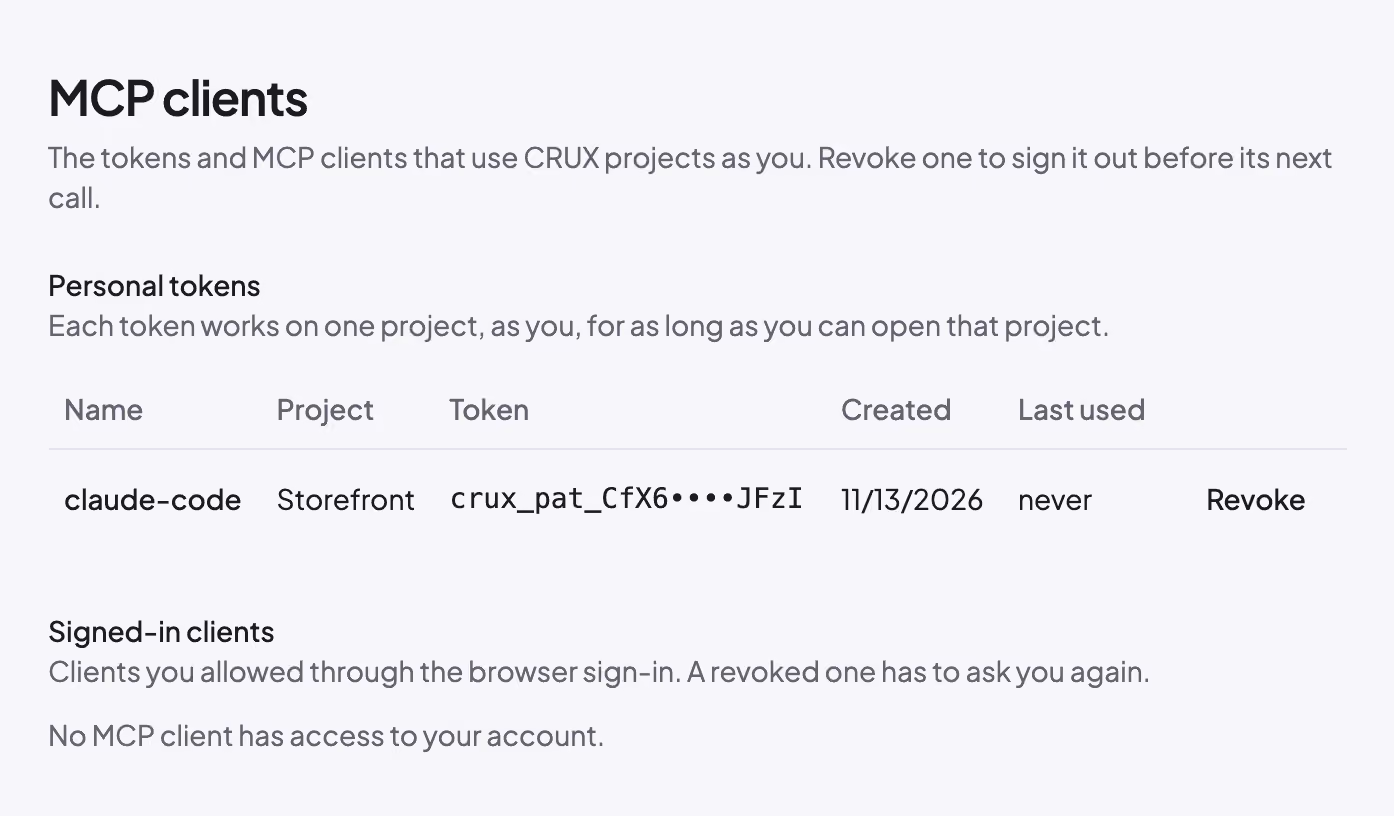
Open your menu (your avatar, top right) and choose MCP clients. The page lists everything that uses CRUX as you:
- Personal tokens, one row per token with its project. Revoke refuses the token's next call.
- Signed-in clients, the clients you allowed through the browser sign-in, with the projects each one may reach. Revoke signs the client out of all of them at once; it has to ask you again.
Access also ends by itself when you leave a project: a token or a client alone reaches nothing once you can no longer open the project.
In short
- CRUX speaks MCP, so the coding agent you already use can work with your project.
- Connect your coding agent: pick a project, pick your agent, create your token, paste the snippets. About a minute, once per project.
- The token is shown once, works on one project and acts as you, with your own access and your name on every comment.
- A person starts every step:
/crux:crux-run KEY-N agentin Claude Code with thecruxplugin, or Copy prompt & wait in any agent. - Revoke a token or a client under your menu → MCP clients.
Try this on your own project. CRUX is free for one person, no card.
Start freeNext: Runs on CRUX or on your machine: where a CRUX agent works
All articles